
Reverse Osmosis Systems And Reverse Osmosis DI Systems.
Reverse osmosis, also known as hyperfiltration, is the finest filtration available today. It is the most common treatment technology used by premium bottled water companies. It is effective in eliminating or substantially reducing a very wide array of contaminants, and of all technologies used to treat drinking water in residential applications, it has the greatest range of contaminant removal. Reverse osmosis will allow the removal of particles as small as individual ions.
Reverse osmosis uses a membrane that is semi-permeable, allowing pure water to pass through it, while rejecting the contaminants that are too large to pass through the tiny pores in the membrane. Quality reverse osmosis systems use a process known as crossflow to allow the membrane to continually clean itself. As some of the fluid passes through the membrane the rest continues downstream, sweeping the rejected contaminants away from the membrane and down the drain. The process of reverse osmosis requires a driving force to push the fluid through the membrane (the pressure provided by a standard residential water system is sufficient - 40 psi+).
Since membranes are subject to degrading by chlorine, iron, manganese, and hydrogen sulfide, and to bacterial attack, a sediment pre-filter and an activated carbon pre-filter and/or post-filter is included with your reverse osmosis system. Water softeners can be used in advance of the RO system when household water is excessively hard to prevent pre-filter and membrane fouling. RO systems are generally the best choice for water contaminated with high nitrite levels as might be found in agricultural areas.
| Arsenic |
Bacteria and Viruses |
Bad Tastes & Odors |
Chlorine | Fluoride |
Hydrogen Sulfide |
Heavy
Metals |
Nitrates | Radon | Sediment | Iron | VOC's |
 |
|
|
|
|
 |
|
|
 |
|
|
|
=
Effectively Removes = Significantly Reduces = Minimal or No Removal * Even though reverse osmosis is effective in removing bacteria and viruses, it is not recommended that your rely upon reverse osmosis if your water is contaminated with bacteria or viruses. Most systems are designed to be used with potable water only.
To determine the difference in contaminants removal rates etc between a reverse osmosis system, and a filtration system alone, go here. For Frequently Asked Questions..
The Order of Filters.
Directly below the "Made in America" label is the first position.
1. Sediment filter.
2. GAC filter. Make sure the rubber gasket is facing up. ie. When you drop it into the housing, you should be able to see it.
3. Carbon Block filter
If it's an RO/DI filter, and the DI is separate from the system, the filter will be installed last, with the gasket towards the top
RESIDENTIAL REVERSE OSMOSIS SYSTEMS
INSTALLATION MANUALS
/amc2inlinedi6s.jpg)
/amcdualdicore.jpg)
A
ll our Residential models of Reverse Osmosis systems include everything you would need to install. The installation is pretty straight forward.
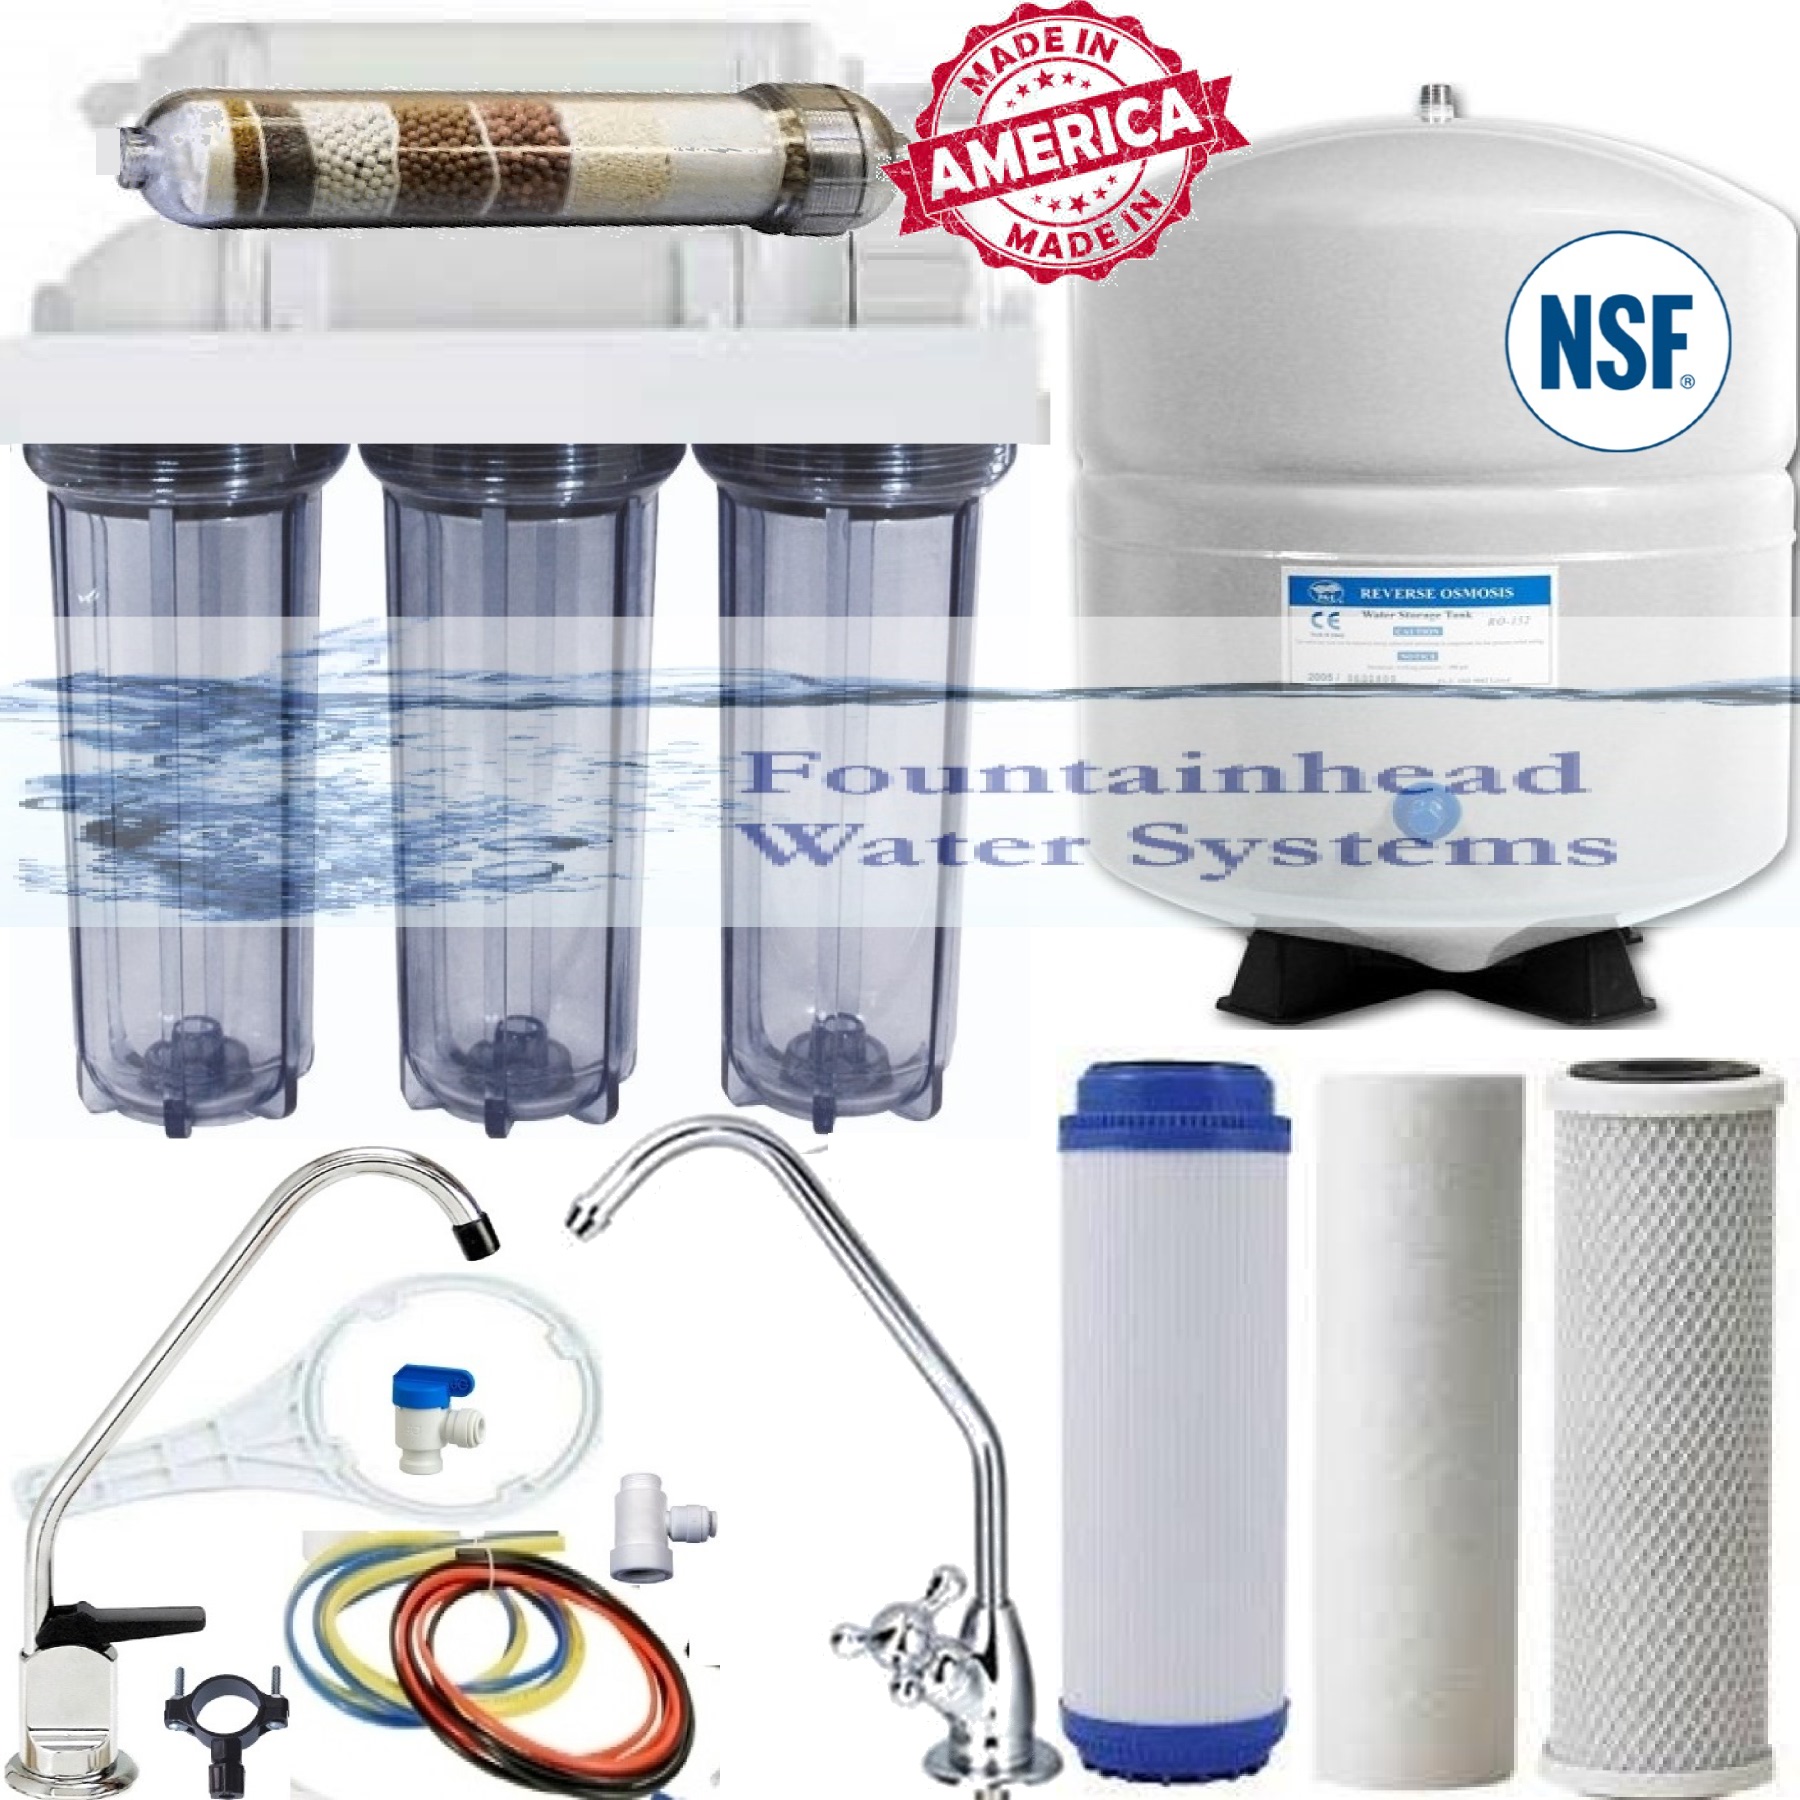
5 Stage Reverse Osmosis systems contain the following:
- 1 SEDIMENT FILTERS 5 MICRON
- 1 CARBON BLOCK FILTER 5 MICRON
- 1 SEDIMENT FILTER 1 MICRON
- 1 MEMBRANE SIZED ACCORDING TO GDP (Gallons Per Day)
- 1 INLINE POST CARBON FILTER
- 3 FILTER HOUSING
- 1 AUTOMATIC SHUT OFF VALVE
- 1 FLOW RESTRICTOR
- 1 RO STORAGE TANK 3.2 gallon with 2.8 gallon capacity- 9" X 15"
- 1 RO FAUCET
- color coded food grade tubing for easy installation
- Feed Water valve
- Check valve on membrane housing
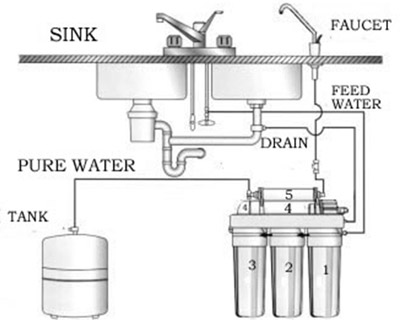
How Reverse Osmosis Works. Return to Top
![]()
There are some important tasks to perform when you first initialize your system. The system comes assembled, except for the housing canisters that needs to be screwed on. Remove the wrappings of the filters, and install in the housings. The first housing, the housing directly after the "IN" line, should be the sediment filter. The second should have the GAC, and the last filter to be installed should be the carbon block filter. Make sure that the "O" ring inside the housing, is seated in the groove. Thread the housings in carefully, do not force it, you will strip the threads.
Before you start up the system, REMOVE THE FLOW RESTRICTER. You want to flush the membrane that has a preservative on it, as well as media fines from the filters. Most models of our reverse osmosis have the flow restricter inserted into the black drain line, on the membrane side. You should be able to see it, once you remove the drain line from the membrane housing.
Removing the flow restricter is not necessary, if you have a manual by pass valve installed on the drain line. If you have the manual drain valve, open it when you initialize the system. Flush for 20-30 minutes, and then replace the flow restricter, or turn off the manual by pass. During these 20-30 minutes, check for leaks. Most of the fittings are screwed on quick connect elbows. HAND TIGHTEN ONLY! If you completely remove a fitting, please add 5-6 turns of teflon tape to the fitting when you replace it. Watch the video on quick connect fittings if the leak is coming from the tubing connection. If the leak is from between the filter housings, use a box wrench to tighten up the nut. Again, do not over tighten.
Flushing the membrane is extremely important for systems with DI filters. If you do not flush the membrane well, you will exhaust the DI filters much sooner than you would otherwise.
On systems with tanks, let the tank fill once, then empty it from the faucet side. After that, let the tank fill again, and you should be ready to start enjoying clean, light, sparkling reverse osmosis ultra pure water! Till the tank has enough water to create water pressure, you will not get any water from the system. Be patient while it fills. You will hear water flowing to drain as the tank is filling. This is how it should be. Once the tank is full, the Automatic Shut Off Valve senses back pressure, and will shut off the system. The process of filling a tank can take over an hour, on bigger tanks, it will take longer.
The first 3-4 days may produce cloudy water. This is normal, as the air in the system slowly escapes. The media in filters are highly fractured, and holds a lot of air. You will notice the same phenomena when you change filters.
It is important to note that the drain line should always flow downward from the system itself. The manual flush on RO/DI units is usually shipped with the flush valve in the open position, ie. the handle of the ball valve is inline with the tubing. Flush the system for at least 30 minutes, to flush away the preservative on the membrane, as well as media fines. Turn the handle perpendicular to the tubing for service mode.
Installation Video Guide. Please see note on the flow restricter.**
Important Information: How to Re-inflate your Storage Tank.
Please also read this important information on how much water a tank should hold.
How John Guest Fittings Work
How to Change Your Reverse Osmosis Membrane*
** The flow restrictor is a different kind than what is portrayed in the videos. The flow restrictor is inserted inside the drainage tubing leading from the membrane housing. You should be able to feel it between your fingers pressing on the tube. This is what it looks like. The color will vary depending on the GPD of your system.
![]()
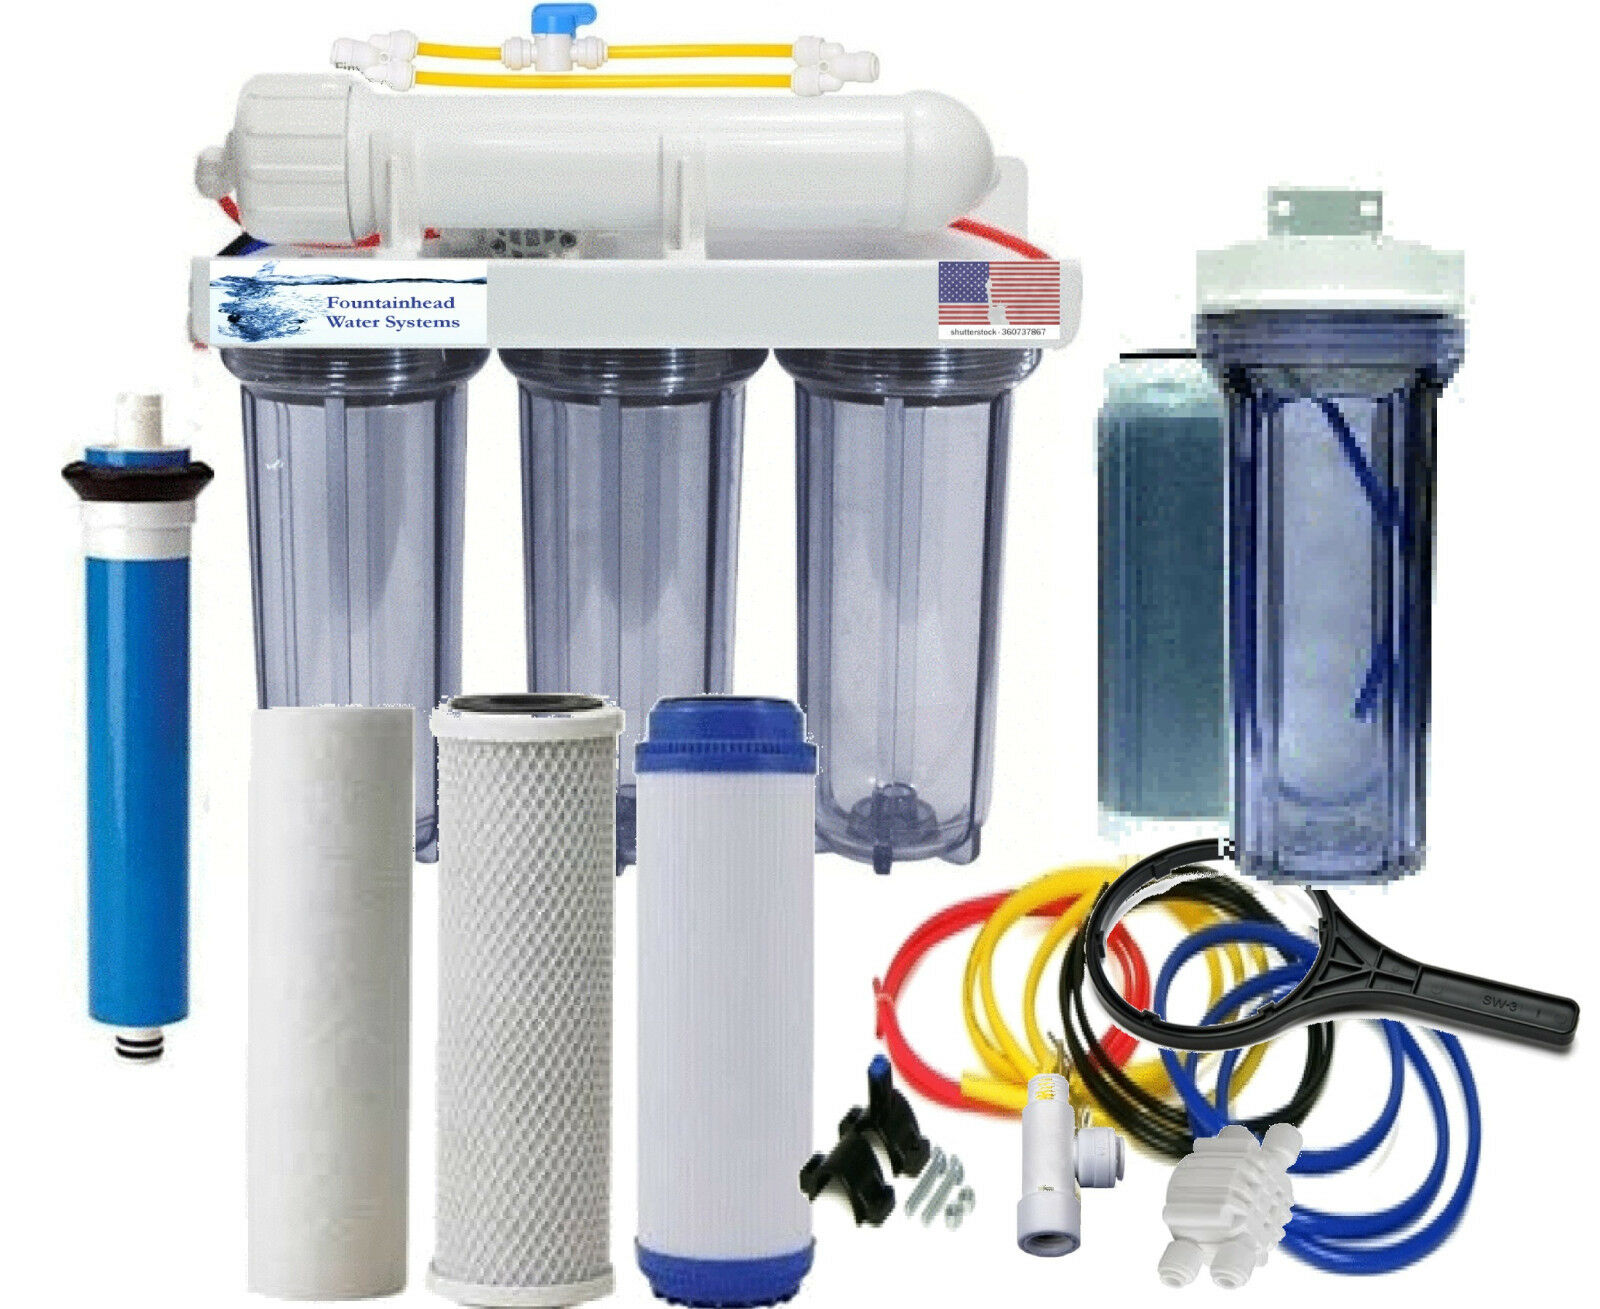
Alkaline Reverse Osmosis Filters
Reverse Osmosis product water is more acidic due to it's purity. By the time the water is processed through the Reverse Osmosis stage, most everything has been stripped away, including minerals etc. To replenish necessary minerals, an alkaline filter is recommended. An alkaline filter is recommended as it replaces Calcium, Magnesium, Sodium, Potassium ion etc, taken away during the purification process. It also rebalances the PH, buffering the acidity, and bringing the water back to a more normal state. Install this filter after the reverse osmosis stage, and before the final carbon filter to preserve the pure sparkling taste. Clear Housing will indicate when media is depleted.
Alkaline/Ionizer Filters
The alkaline filter, the 5th stage in a system is recommended, as reverse osmosis product water tends to be acidic due to the purity of the water. All minerals have been stripped from the water. To buffer the water to a more natural alkaline state, and to add essential minerals back ie. calcium, magnesium, potassium and sodium. We highly recommend the alkaline filter. This filter will increase the alkalinity without over correcting.This alkaline antioxidant filter provides abundant Active Hydrogen and also increases reduction power by increasing pH, making small water cluster and providing beneficial minerals. Negative ORP, which is produced with ionized alkaline water, severely retards the aging process. By counteracting oxidative damage to our cells. It does this by hunting down free radicals in our system and neutralizing them. Negative ORP is a very powerful anti-oxidant. and is found naturally in orange juice, glacial runoff and deep underground uncontaminated aquifer or spring water.
We offer systems with Alkaline Ionizer Neg ORP with normal ph, as well as High Alkalinity Neg ORP filters
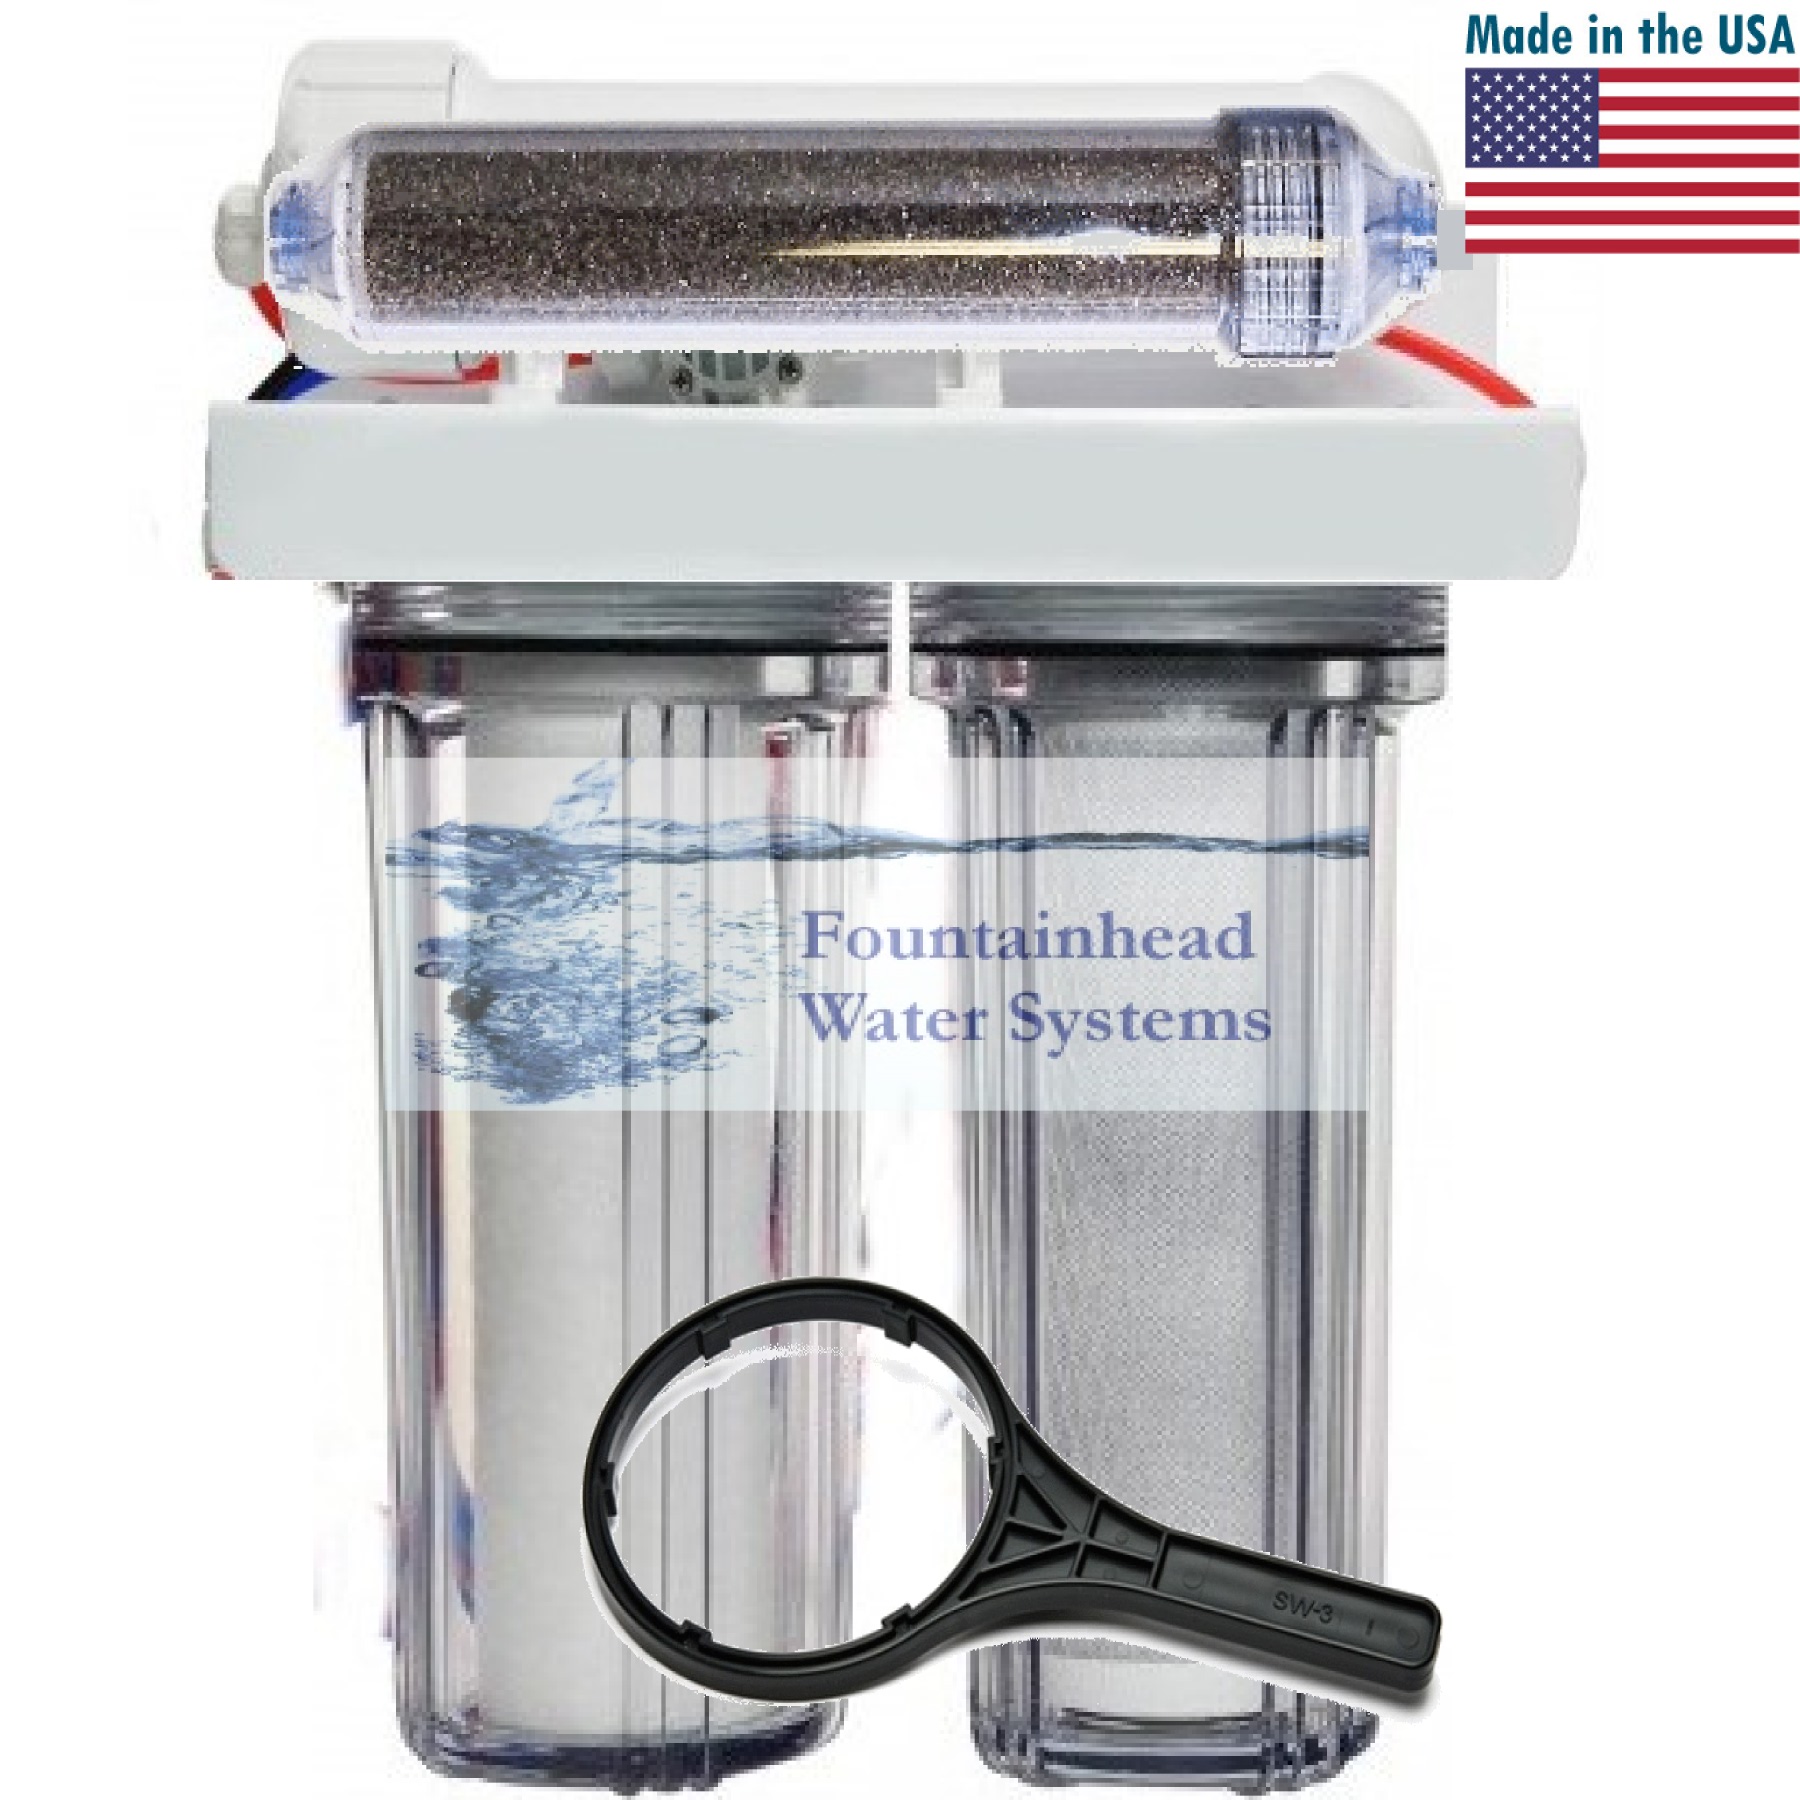
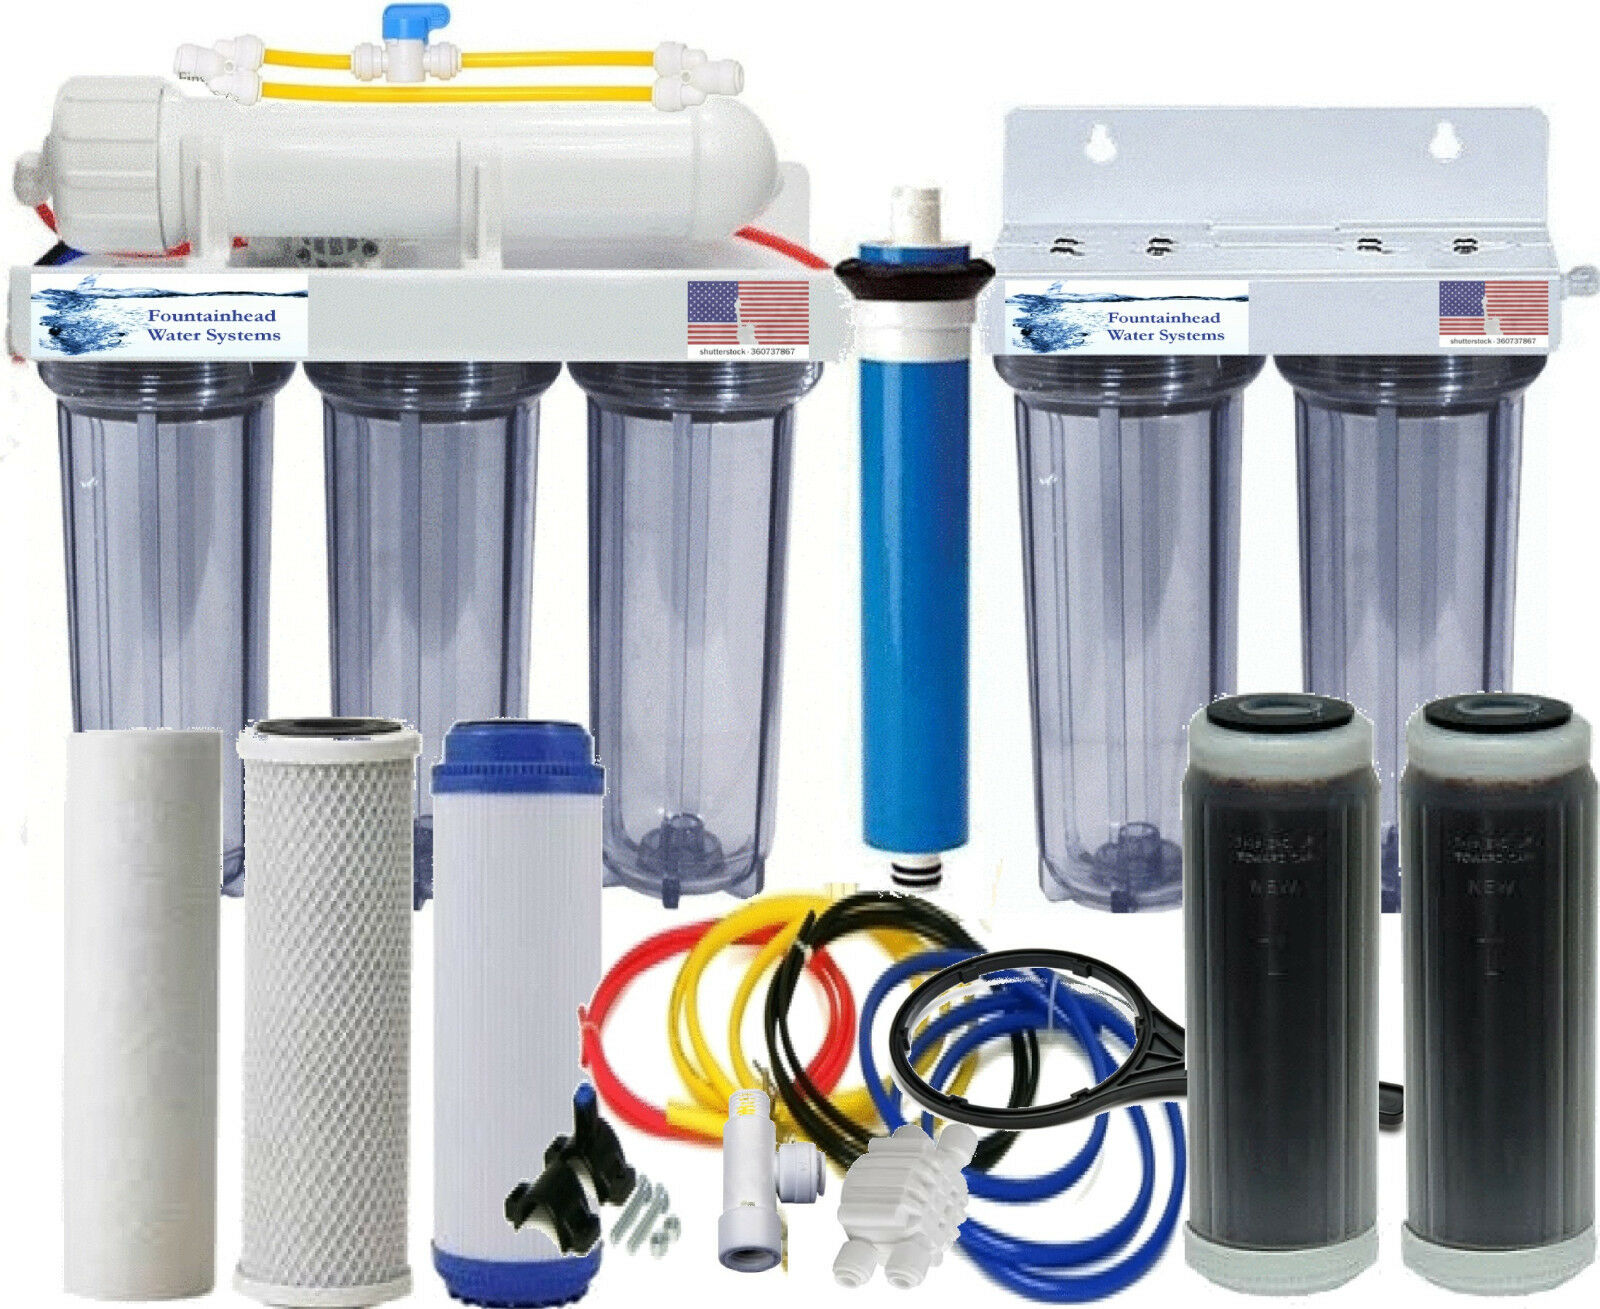
RO DI Systems. For Aquariums and Reef tanks.
DI Resin is necessary to reduce Total Dissolved Solids (TDS) to zero and is the last stage of an RO/DI unit. It is unnecessary to use the expensive proprietary DI cartridges that other RO manufacturers sell. Simply buy a refillable DI cartridge and fill with DI resin. You'll save money and get the same results. All our DI filters are refillable, and clear, so you can see if the media is exhausted. The media will change to a tan color as it is used up. Buy your DI directly from our store.
A constant supply of high purity water can be obtained by using two cartridges in series and allowing the first cartridge to get completely depleted. During this operation, the second cartridge ensures that the water leaving the system is of the highest purity. New cartridges are placed into the polishing position and the remaining cartridge is put into the “roughing” position. This ensures complete utilization of all the exchange capacity. This may be an important feature to consider if you are very particular about final product purity. We have 2 stage DI configurations, as well as a single stage.
Some models offers a manual valve. The manual valve prevents "TDS creep". Turn on the manual valve periodically to flush the membrane. Close the inline ball valve when you are done to return the system into service mode.
All the systems we offer are easily modified or upgraded as your needs change. All our systems include lifetime technical support. Please call us if you have any questions, or decide to modify the system to suit your needs.
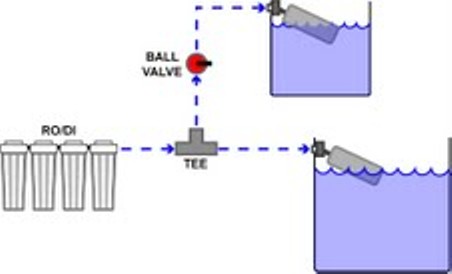
If you are using the RO DI system to fill a reservoir, we recommend that you use a float valve to shut off the system. Once the ASV valve senses back pressure, as the switch is closed, the system will shut off. You could also use an inline ball valve.

-

- :
 sales@fountainheadwatersystems.com
 Phone: 512-758-0224
 -
 Shopping Cart